Sindh cuisine
Bombay Biryani (Pakistani Style)
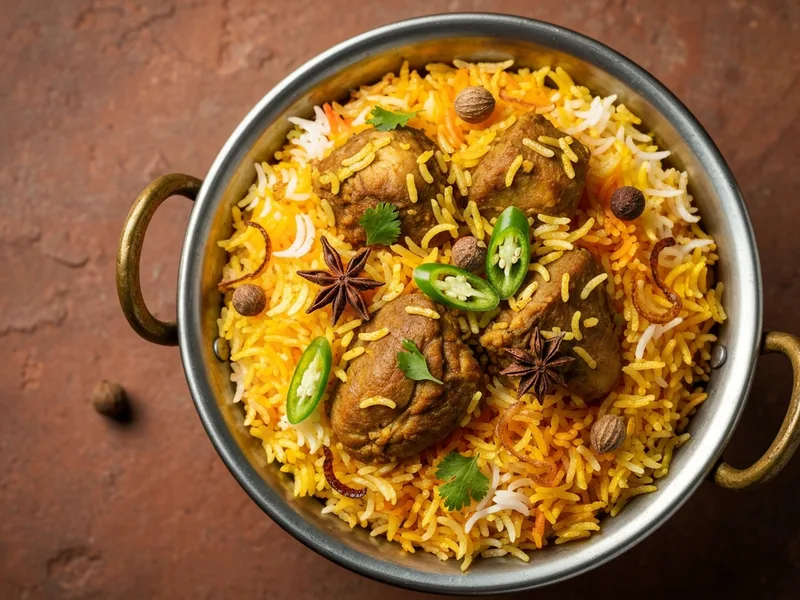
Bombay Biryani (Pakistani Style) is a traditional Sindh Pakistani dish. The Muhajir community's answer to Karachi biryani — more fragrant, more Nawabi, with fried potatoes, aloo bukhara (dried plums), kewra water, and a sweeter, more layered aromatic profile. Born in Bombay, perfected in Karachi.
Bombay Biryani and Karachi Biryani are cousins — both born from the same Muhajir community that came to Pakistan during Partition in 1947 — but they have very different personalities at the table. Karachi biryani is loud, fiery, and unapologetically red. Bombay biryani is its more refined older sibling: fragrant with kewra water and rose water, tempered with sweetness from aloo bukhara, and layered with the birista (fried onions) that go INTO the masala rather than merely on top.
These cooks carried their recipes in their memories across the newly drawn border in 1947, and what we cook today is a living document of that migration. The two key ingredients that define Bombay biryani — kewra water (distilled from the screwpine flower) and aloo bukhara (dried sour plums) — create a sweet-sour-floral complexity that no other biryani variant achieves. Don't skip either of them.
Ingredients
Instructions
- FRY THE BIRISTA (FRIED ONIONS): Heat 4 tablespoons of ghee or oil in a karahi over medium-high heat. Add the thinly sliced onions. Fry, stirring frequently, for 20-25 minutes until they turn a deep golden-amber colour and become crispy. Remove immediately onto kitchen paper — they will continue to darken after removal, so pull them out while still slightly lighter than your target. Reserve the ghee left in the karahi for cooking the masala. Half the birista goes into the masala; the other half is reserved for garnish. HINT: If even one onion slice burns black, the entire birista will taste bitter. Fish out any dark pieces immediately.
- FRY THE POTATOES: In the same ghee remaining in the karahi, add the halved potatoes. Fry on medium-high heat, turning occasionally, for 8-10 minutes until the outside is golden and sealed. The inside should still be partially raw — it will finish cooking in the masala. Remove to a plate. This golden exterior is what stops them from breaking apart in the biryani. HINT: If you add potatoes to masala without frying them first, they absorb too much masala and disintegrate. Fried potatoes hold their shape and become the best thing in the pot.
- BUILD THE MASALA: In the same karahi, add the meat pieces and stir over high heat for 3-4 minutes to colour the outside. Add the yoghurt and biryani masala. Stir well. Add the chopped tomatoes. Cook on medium heat for 10 minutes, stirring regularly, until the tomatoes break down and oil begins to appear at the surface (the 'bhunoing' stage — this is when the masala is properly cooked). Add the soaked aloo bukhara (with their soaking water), the lemon juice, and half the birista. Stir to combine.
- COOK THE MEAT: Add enough water to just cover the meat (about 1 cup for chicken, 2 cups for mutton). Cover the karahi and cook on low-medium heat until the meat is tender — chicken takes 20-25 minutes, mutton takes 45-60 minutes. The masala should be rich and thick — not watery — by the time the meat is done. If it looks too liquidy with 10 minutes left, uncover and cook on high heat to reduce. Add the fried potatoes in the last 10 minutes of meat cooking. Taste and adjust salt.
- PARBOIL THE RICE: In a large degh (pot) or separate pot, bring 3 litres of heavily salted water to a rolling boil (it should taste like mild seawater). Add the whole spices. Drain the soaked rice and add to the boiling water. Cook for exactly 6-7 minutes — the rice should be 70% cooked. It should bend slightly but still have a firm white core when you bite a grain. This undercooking is intentional: it will finish during dum (steam) cooking. Drain immediately through a colander. Do not rinse.
- LAYER THE BIRYANI: In a large degh or pot, create layers. First, spread the meat masala as the bottom layer — scrape every last bit of sauce from the karahi. Place the fried potatoes and aloo bukhara evenly. Now spread the parboiled rice over the top in an even layer. Drizzle the saffron-milk mixture over the rice in a spiral pattern (this creates the signature two-tone white and golden rice). Drizzle 1 tablespoon of kewra water evenly. Scatter the remaining birista over the top. Drizzle a final tablespoon of ghee.
- DUM (STEAM) COOK: Place the pot over high heat for 3 minutes until you hear active bubbling and see steam escaping. Reduce heat to the absolute minimum your stove can produce. Place a folded kitchen towel or thick tawa (griddle) between the pot and the flame — this creates a heat diffuser. Cover tightly with a lid sealed with a rope of dough (atta) around the rim — this traps all steam inside. Alternatively, cover with a tight lid and a heavy weight on top. Cook for 25 minutes on minimum heat. WHY dough seal? If even small amounts of steam escape during dum, the biryani dries out and the rice on top will be undercooked.
- REST AND SERVE: After 25 minutes, remove from heat. Do not open the lid for 10 more minutes — residual steam continues cooking. After resting, open the lid and inhale: you should smell the kewra water and saffron before you see anything. Use a large chamcha (ladle) or flat spatula to plate, making sure each serving has rice, meat, a potato, and some aloo bukhara. The two-tone rice (golden saffron streaks through white) is the signature look. Drizzle 1 more tablespoon of kewra water over the served portions.
Chef's Secrets
- The kewra water is a perfume — use precisely 2 tablespoons total (1 in the layering, 1 when serving). More than this tips from fragrant into medicinal. Less and you lose the defining Bombay biryani character.
- Soaking the aloo bukhara in warm water before adding them to the masala plumps them up and releases their sour flavour into the soaking water — add the soaking water too, don't throw it away. This is concentrated flavour.
- The dum (steam) is everything. Resist the urge to lift the lid and check — every peek releases the steam that is cooking the top layer of rice. Set a timer and walk away.
- Bombay biryani tastes better the next day. The kewra and aloo bukhara flavours deepen overnight. Make it a day ahead for a dinner party — reheat gently with a splash of water in a sealed pot.
- Shan Bombay Biryani Masala is formulated specifically for this variant and does an excellent job. Using a generic biryani masala and then adding extra coriander seed and mace (javitri) gets you close. Javitri is the specific spice that gives Bombay biryani its Nawabi warmth — worth seeking out.
Common Questions
How long does Bombay Biryani (Pakistani Style) take to make?
Total time is 2h 30m — 1h prep and 1h 30m cooking.
How many servings does this recipe make?
This recipe makes 6 servings, and is rated hard difficulty.
Which region of Pakistan is Bombay Biryani (Pakistani Style) from?
Bombay Biryani (Pakistani Style) is from Sindh, Pakistan — one of the country's most distinctive culinary traditions.
What do you serve with Bombay Biryani (Pakistani Style)?
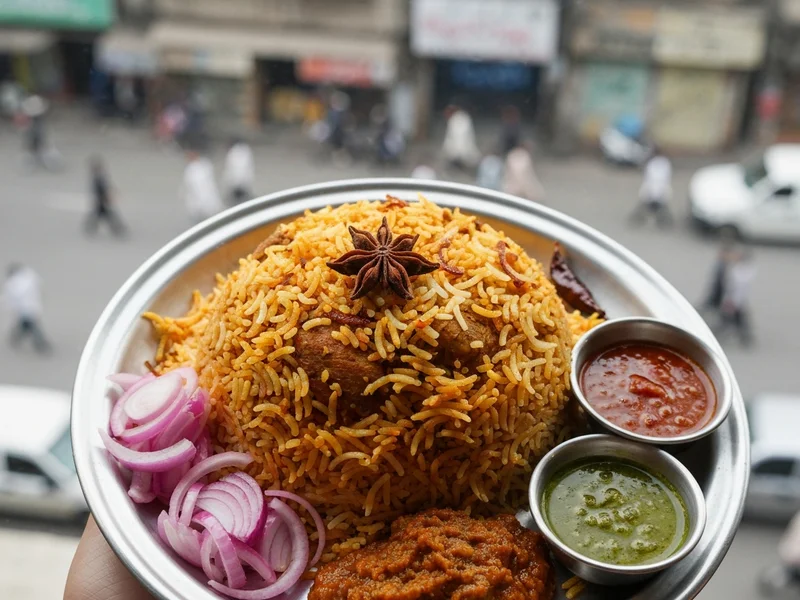
Serve with raita (yoghurt with cucumber and mint), a green salad of sliced onion and tomato with lemon juice, and hari chatni (green coriander chutney). The sweetness of the biryani pairs beautifully with the cool, sour raita.
Goes Well With
Authentic Karachi Biryani
The iconic Karachi-style biryani — fiery, tangy, loaded with potatoes and prunes. Born in the streets of Karachi, perfected by generations of Muhajir cooks.
Hyderabadi Biryani
The kacchi biryani of Hyderabad, Sindh — raw marinated meat layered with parboiled rice, sealed, and slow-cooked until every grain absorbs the masala. No pre-cooking the meat.
Lahori Biryani
The Punjabi biryani — more aromatic, less fiery, more balanced than its Karachi cousin. Built on overnight-marinated meat, a bouquet of whole aromatic spices, and a dum layer fragrant with saffron, kewra, and rose water. Lahori confidence in every grain.
What Cooks Are Saying
This is now my go-to recipe. Made it three times already.
I've tried many recipes for this dish but this one is the best by far.
Leave a Review
Tried this recipe? Share your experience — your review helps other cooks.