Sindh cuisine
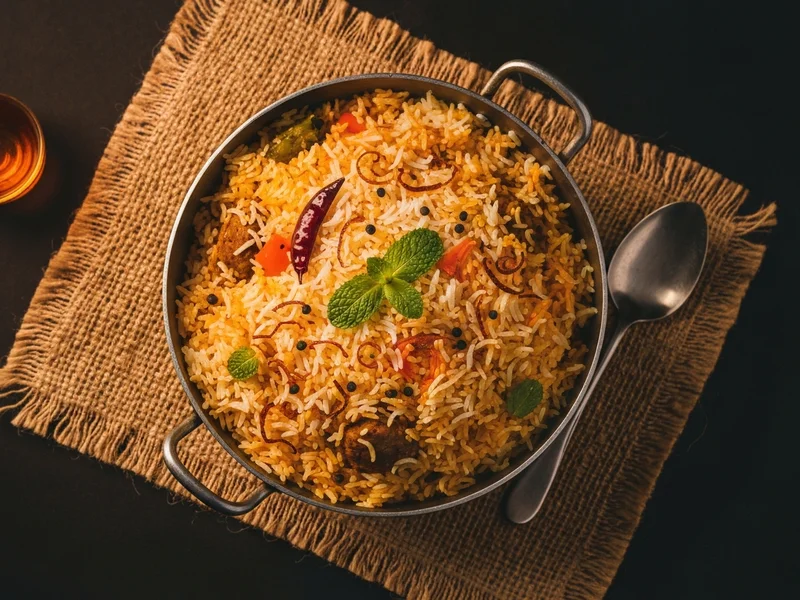
Hyderabadi Biryani
Hyderabadi Biryani is a traditional Sindh Pakistani dish. The kacchi biryani of Hyderabad, Sindh — raw marinated meat layered with parboiled rice, sealed, and slow-cooked until every grain absorbs the masala. No pre-cooking the meat.
This is kacchi (raw) biryani: you layer raw marinated gosht (meat) under parboiled chawal (rice), seal the degh (heavy-bottomed pot), and let dum (steam cooking) do all the work. No peeking. No stirring. Just faith in the process. The bawarchis (master cooks) of Sindhi weddings have been doing this in massive deghs for centuries, guarding their masala blends the way tech companies guard source code. The aloo (potatoes) fried golden and tucked between meat and rice? That's the real prize — people have been known to dig straight to the bottom of the pot for those. If you're making biryani for the first time, this recipe will walk you through every moment of uncertainty. And yes, it's worth it.
Ingredients
Instructions
- Start the marinade (minimum 4 hours before cooking — overnight is ideal). In a large bowl, add your gosht (mutton) pieces. Pour in the whisked dahi (yoghurt), adrak-lehsan (ginger-garlic) paste, biryani masala, lal mirch (red chilli powder), and a generous 1.5 tsp namak (salt). Add half the barista pyaz (fried onions), half the hari mirch (green chillies — slit), and half the pudina (mint) and dhaniya (coriander). Mix everything with your hands — really massage the marinade into the meat. Every piece should be well coated. Cover with cling film and refrigerate. HINT: The longer you marinate, the more tender your gosht. 4 hours is the minimum. Overnight is the sweet spot. Beyond 24 hours and the yoghurt starts to make the meat mushy.
- Parboil the chawal (rice). Bring a large pateela (pot) of water to a rolling boil — use at least 8 cups. Add all your saabut masalay (whole spices): tej patta (bay leaves), badi elaichi (black cardamom), choti elaichi (green cardamom), dalchini (cinnamon), laung (cloves), javitri (mace). Add enough namak (salt) that the water tastes like seawater — seriously, taste it. Drain your soaked rice and add it to the boiling water. Cook for EXACTLY 5 minutes. Set a timer. The rice should be about 60% done — if you bite a grain, it should be soft on the outside but still have a firm, chalky white centre. Drain IMMEDIATELY in a colander. Do not rinse. HINT: If the rice is fully cooked at this stage, your biryani will turn to mush during dum. Undercooked rice is your friend here.
- Fry the aloo (potatoes). While your rice soaks or boils, heat about 1 cup of oil in a karahi (wok) or deep pan over medium-high heat. Test the oil: drop a small piece of potato in — it should sizzle immediately and float up. Add the halved, peeled potatoes and fry for about 8-10 minutes, turning occasionally, until they're deep golden all over. They should look like they've been sunbathing. Remove with a slotted chamcha (ladle) and set on a plate lined with paper towel. HINT: Don't crowd the pan — fry in batches of 3-4 halves. Crowding drops the oil temperature and gives you pale, soggy potatoes instead of crispy golden ones.
- Build the layers in your degh (heavy-bottomed pot). Use the heaviest pot you own — thick-bottomed is essential to prevent burning. Spread the RAW marinated gosht in an even layer across the bottom. Do NOT pre-cook the meat — this is kacchi biryani, and the whole point is that the meat cooks in the dum steam. Place the fried aloo on top of the meat, cut-side down. Tuck the soaked aloo bukhara (dried plums) into the gaps between potato and meat. FUN FACT: The layering order isn't random — the meat goes at the bottom because it needs the most direct heat, and the potatoes act as a buffer that prevents the rice from getting too wet from the meat juices.
- Add the chawal (rice) layer. Gently spoon the parboiled rice over the meat and potato layer, spreading it evenly. Try not to press it down — loose rice steams better. Now scatter the remaining barista pyaz (fried onions), pudina (mint leaves), dhaniya (coriander), and hari mirch (green chillies) over the rice. Drizzle the zafran (saffron) milk in lines across the top — this creates those beautiful golden streaks. Dot the desi ghee evenly across the surface. Finally, pour 2-3 tablespoons of water gently down the SIDES of the pot (not over the rice). This creates the initial steam burst that kickstarts the dum process.
- Seal the pot for dum — this step is make-or-break. Tear off a large piece of aluminium foil, press it tightly over the top of the degh, crimping it around the edges so no steam can escape. Then press the lid down firmly on top of the foil. If your lid is loose, place something heavy on it (a filled kettle works brilliantly). The steam needs to stay trapped inside — that's literally what cooks the raw meat and finishes the rice. HINT: If you see steam escaping from the sides, you'll end up with undercooked meat and dry rice. Take the extra 30 seconds to seal it properly. This is not the step to be lazy on.
- The dum (steam cooking) — the moment of truth. Place the sealed degh on HIGH heat for exactly 8-10 minutes. You'll hear the pot start to hiss and bubble — that's the steam building up, and that's good. Now comes the patience: reduce to the LOWEST possible flame your stove can manage. If you have a cast-iron tawa (flat griddle pan), place it between the burner and the pot — this diffuses the heat beautifully and prevents the bottom layer from burning. Cook for 50-60 minutes on this low flame. Do NOT open the lid. Do NOT peek. Do NOT 'just check quickly.' Every time you break the seal, you lose precious steam and risk undercooked meat. Trust the process. HINT: If you smell burning at any point, your flame is too high. Slide the tawa underneath and reduce the heat further.
- The grand reveal. Turn off the heat completely. Let the pot sit, still sealed, for 15 minutes — this resting period lets the steam redistribute and the layers settle. Now remove the lid and foil. The smell that hits you? That's the whole point of biryani. Using a large chamcha (ladle), gently fold the rice from the bottom upward, mixing the layers partially. You want some mixing, but also visible streaks of zafrani (saffron) rice, white rice, and masala-stained rice from the meat layer. Don't stir aggressively — you'll break the rice grains and end up with khichdi instead of biryani. Serve immediately with burani raita (yoghurt with fried lehsan/garlic and zeera/cumin) and kachumber salad (diced pyaz/onion, tamatar/tomato, hari mirch/green chilli).
Chef's Secrets
- Kacchi biryani means the meat goes in RAW — that's the whole philosophy. Do not panic, do not pre-cook. The sealed steam environment cooks the gosht perfectly while infusing every grain with meaty flavour. If you pre-cook the meat, you've made a different dish entirely.
- Your barista pyaz (fried onions) must be deep mahogany brown — the colour of dark chocolate, not pale gold. This takes 15-20 minutes of patient frying. Pale onions won't give you the right sweetness, colour, or depth. HINT: Add a pinch of namak (salt) to the onions while frying — it draws out moisture and speeds up browning.
- Place a tawa (flat griddle pan) under your degh during dum. This simple trick diffuses direct heat and is the difference between a beautiful bottom layer and a charred, bitter mess. Professional bawarchis always use one.
- The dahi (yoghurt) marinade isn't just for flavour — it tenderises the raw meat AND provides the moisture that becomes steam during dum cooking. Do not reduce the quantity or skip it. Without enough yoghurt, you won't generate enough steam to cook the raw meat through.
- FUN FACT: Professional bawarchis in Sindh use the 'finger test' for rice — they press a parboiled grain between thumb and forefinger. It should crush easily on the outside but you should feel a tiny hard core in the centre. That's your 60% mark. Practice this and you'll never overcook biryani rice again.
Common Questions
How long does Hyderabadi Biryani take to make?
Total time is 1h 55m — 40m prep and 1h 15m cooking.
How many servings does this recipe make?
This recipe makes 8 servings, and is rated hard difficulty.
Which region of Pakistan is Hyderabadi Biryani from?
Hyderabadi Biryani is from Sindh, Pakistan — one of the country's most distinctive culinary traditions.
What do you serve with Hyderabadi Biryani?
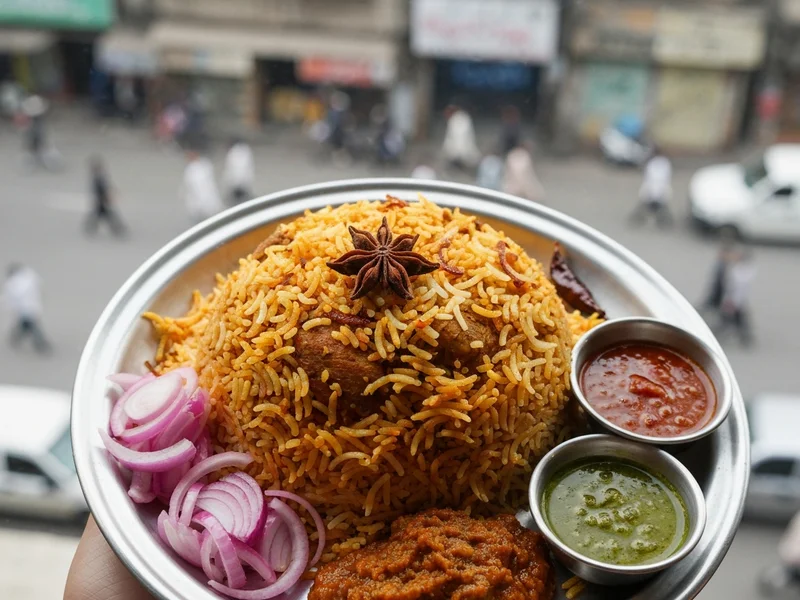
Serve with a cooling burani raita — dahi (yoghurt) with tali hui lehsan (fried garlic) and bhuna zeera (roasted cumin). Add a kachumber salad of diced pyaz (onion), tamatar (tomato), and hari mirch (green chilli) dressed with nimbu (lemon) juice. For the full Sindhi wedding experience, serve mirchi ka salan (green chilli curry) alongside. FUN FACT: At Sindhi weddings, the biryani is always served with a boiled anda (egg) on top — it's considered incomplete without one.
Goes Well With
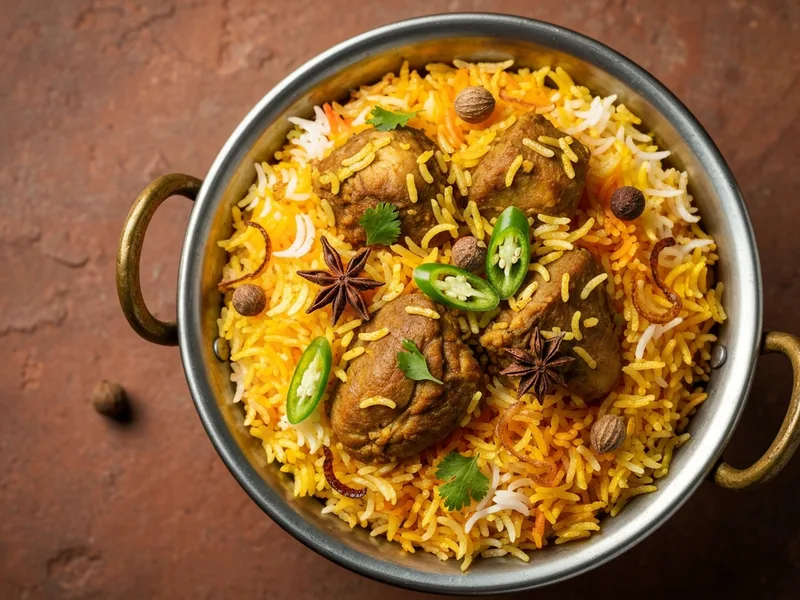
Authentic Karachi Biryani
The iconic Karachi-style biryani — fiery, tangy, loaded with potatoes and prunes. Born in the streets of Karachi, perfected by generations of Muhajir cooks.
Bombay Biryani (Pakistani Style)
The Muhajir community's answer to Karachi biryani — more fragrant, more Nawabi, with fried potatoes, aloo bukhara (dried plums), kewra water, and a sweeter, more layered aromatic profile. Born in Bombay, perfected in Karachi.
Lahori Biryani
The Punjabi biryani — more aromatic, less fiery, more balanced than its Karachi cousin. Built on overnight-marinated meat, a bouquet of whole aromatic spices, and a dum layer fragrant with saffron, kewra, and rose water. Lahori confidence in every grain.
What Cooks Are Saying
This is now my go-to recipe. Made it three times already.
I've tried many recipes for this dish but this one is the best by far.
Leave a Review
Tried this recipe? Share your experience — your review helps other cooks.