Punjab cuisine
Lahori Gola Kebab
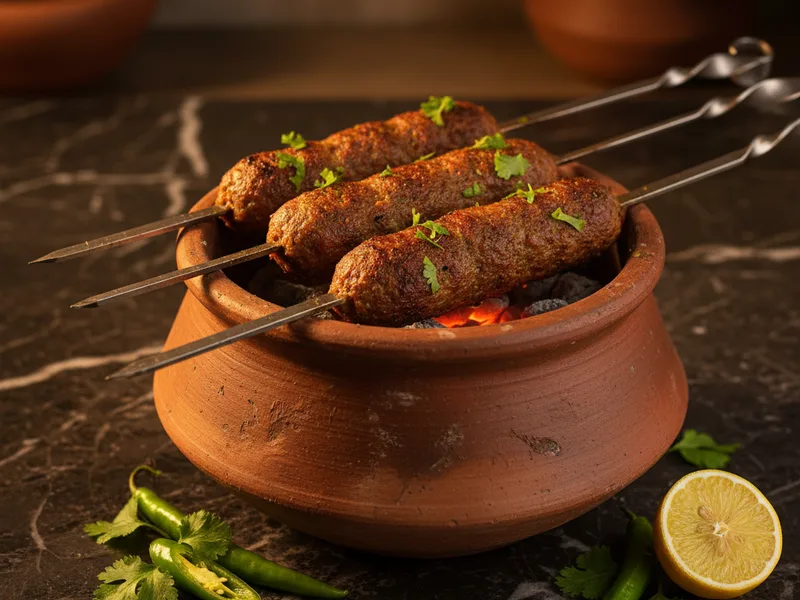
Lahori Gola Kebab is a traditional Punjab Pakistani dish. Lahore's most beloved kebab — silky ground beef and lamb balls skewered on wide seekhs, kissed by charcoal, and finished with dhungar smoke. A wedding staple and dhaba legend.
Gola Kebab is what happens when Lahori cooks decide that seekh kebab is too ordinary.
Every nihari wala in the old city of Lahore has a gola kebab version, but the real magic happens at the big wedding venues of Gulberg and Model Town, where you'll find a dedicated kebab ustad (master) with a charcoal bhatti (brazier) doing nothing else all evening. The secret weapons? Raw papaya paste that melts the protein fibres until the mince is almost custardy inside, roasted besan (gram flour) that binds without drying, and the dhungar — a smouldering coal trick borrowed from the Mughal kitchen that gives these kebabs their smoky, almost meaty-campfire perfume. No tandoor required. Just patience, mince, and a piece of coal.
Ingredients
Instructions
- ROAST THE BESAN: Heat a dry tawa (flat griddle) or frying pan on medium-low heat. Add the besan (gram flour) and stir constantly with a chamcha (spoon) for 3-4 minutes. WHY: Raw besan has a bitter, starchy taste that will ruin your kebabs — roasting activates its nutty flavour and removes excess moisture so it binds rather than makes the mix soggy. You'll know it's done when it smells like roasted peanuts and turns a golden-beige colour. Spread it on a plate to cool completely before using — hot besan in the mince will partly-cook the meat.
- MAKE THE PAPAYA PASTE: If using fresh raw papaya, peel a small green papaya and grate 3-4 tablespoons on the fine side of your grater. Place in a muslin cloth or clean kitchen towel and squeeze out the juice — you want the paste, not the liquid. HINT: Wear gloves if you have sensitive skin — raw papaya sap can mildly irritate. The paste should be a pale greenish-white colour. This goes directly into your mince. WHY: Papain, the enzyme in raw papaya, physically shreds the tough connective tissue in meat at a molecular level. This is how Lahori grill masters achieve that almost-silky interior despite cooking over high heat.
- MIX THE MINCE: In a large bartan (bowl), combine the beef mince and lamb mince. Add: raw papaya paste, roasted besan, ginger-garlic paste, green chillies, and red chilli powder. Mix with your hands — no spoon will do this properly. Squeeze and fold the mixture for a full 5 minutes until it becomes homogenous and slightly sticky. HINT: The mixture should feel like slightly dense play-dough. If it feels wet and sloppy, add another tablespoon of roasted besan. If it feels too stiff, wet your hands lightly. Now add garam masala and salt last, mix for another minute. WHY: Adding salt last prevents the salt from drawing out moisture mid-mix.
- REST THE MINCE: Cover the bartan with cling film and refrigerate for at least 2 hours, preferably overnight. FUN FACT: The overnight rest isn't just for flavour — it allows the papain enzyme to continue its tenderising work on the raw mince in a controlled way. It also lets the besan fully hydrate and stiffen the mixture, making seekh-mounting much easier. After resting, the mixture should feel firmer and denser. If the mince feels very cold and stiff from the fridge, let it sit at room temperature for 15 minutes before shaping.
- SHAPE ON SEEKHS: Wet your hands with cold water. Take a generous fistful of mince (roughly 80-90g) and press it firmly around the centre of a wide, flat seekh (skewer). Unlike regular seekh kebab which you press in a long cylinder, gola kebab is pressed into a compact ball or oval around the seekh — about the size of a large lemon. The flat seekh (wider than a round skewer) is important: it grips the mince better and prevents spinning. HINT: Press firmly from all sides and slightly pinch the top and bottom. If the kebab cracks or slides, your mince is too wet — return it to the fridge for 30 more minutes.
- GRILL THE KEBABS: Prepare your mangal (charcoal grill) with a good bed of hot coals. The coals should be glowing red with a grey ash coating — no naked orange flame. HINT: If grilling at home without a charcoal mangal, use a cast iron grill pan on high heat, or an outdoor gas grill on maximum. Place seekhs over the coals and grill for 8-10 minutes, rotating every 2 minutes. Brush with ghee each time you rotate. You're looking for: a deep golden-brown crust with slight char marks, and the kebab feeling firm (not squishy) when gently pressed. The smell should be smoky and meaty. Avoid pressing the kebab against the grill — it causes the mince to stick and tear.
- THE DHUNGAR FINISH: This is the step that separates restaurant-quality gola kebab from home cooking. Place all grilled kebabs (still on their seekhs) into a large degh (pot) or deep bartan with a lid. Place a small steel katori (bowl) in the centre of the kebabs. Heat a piece of hardwood charcoal directly on your stove flame until it glows bright orange — 3-4 minutes. Using tongs, drop the glowing coal into the katori. Immediately drizzle 1 tbsp of ghee over the hot coal — it will smoke intensely. Slam the lid shut. Wait 2-3 minutes. WHY: The dhungar (smoke infusion) technique layers a deep, ancient smokiness into every crevice of the kebab — it mimics the effect of a traditional underground clay kiln (tandoor) that home grills can't replicate. This trick comes straight from Mughal court kitchens. Open in a smoky cloud and serve immediately.
Chef's Secrets
- The ratio of lamb to beef matters: too much beef with no lamb fat and your kebab will be dry and crumbly. If lamb is unavailable, add 2 tbsp of ghee directly into the mince to compensate.
- Always roast your besan before adding it to the mince. Raw besan creates a paste-y, floury texture and ruins the delicate flavour balance.
- Don't skip the overnight rest in the fridge. In a hurry, 2 hours is the minimum — but overnight mince is noticeably silkier.
- Use hardwood charcoal (coconut shell or real wood) for dhungar, never briquettes. Briquette smoke has chemical after-taste that ruins the kebab.
- If your kebabs crack when sliding off the seekh, the mixture needs more besan. Add 1 tbsp at a time and re-rest for 30 minutes.
- Serve immediately after dhungar — the smoke fragrance dissipates within minutes. Have your naan and chutney ready before you lift the lid.
Common Questions
How long does Lahori Gola Kebab take to make?
Total time is 55m — 30m prep and 25m cooking.
How many servings does this recipe make?
This recipe makes 6 servings, and is rated medium difficulty.
Which region of Pakistan is Lahori Gola Kebab from?
Lahori Gola Kebab is from Punjab, Pakistan — one of the country's most distinctive culinary traditions.
What do you serve with Lahori Gola Kebab?
Serve on a bed of sliced onions and fresh mint with naan or sheermal (sweet saffron bread). Pair with pudina (mint) chutney and imli (tamarind) chutney on the side. A squeeze of lemon and raw onion rings are non-negotiable. At Lahori dhabas, gola kebab is always served with a raita (yoghurt dip) to cool the heat.
Goes Well With

Gola Kebab Karachi
Karachi's Gola Kebab is the rotund, juicy cousin of seekh kebab — round mince patties cooked on a tawa (griddle) or grill with a distinctive jerk-and-spin technique that Karachi grill cooks have turned into performance art.
Punjabi Gola Kebab
Punjabi Gola Kebab has a distinctly Lahori spice profile — more garam masala, more ginger, and the characteristic Punjabi love of fresh mint — producing round, beautifully flavoured kebabs that are Lahore's favourite tawa snack.
Karachi Gola Kebab — Seekh on Charcoal
Authentic Karachi-style gola kebab — minced beef marinated with raw papaya, red chillies and aromatic spices, hand-moulded around flat seekh skewers and cooked over charcoal until charred and smoky. The crown jewel of Karachi's BBQ culture, requiring technique but delivering spectacular results.
What Cooks Are Saying
The instructions are so clear and easy to follow. Came out perfectly first try.
Very tasty — I'll tweak the salt next time but overall really happy with how it turned out.
Better than the restaurant version. The tips in the recipe really make a difference.
Leave a Review
Tried this recipe? Share your experience — your review helps other cooks.