
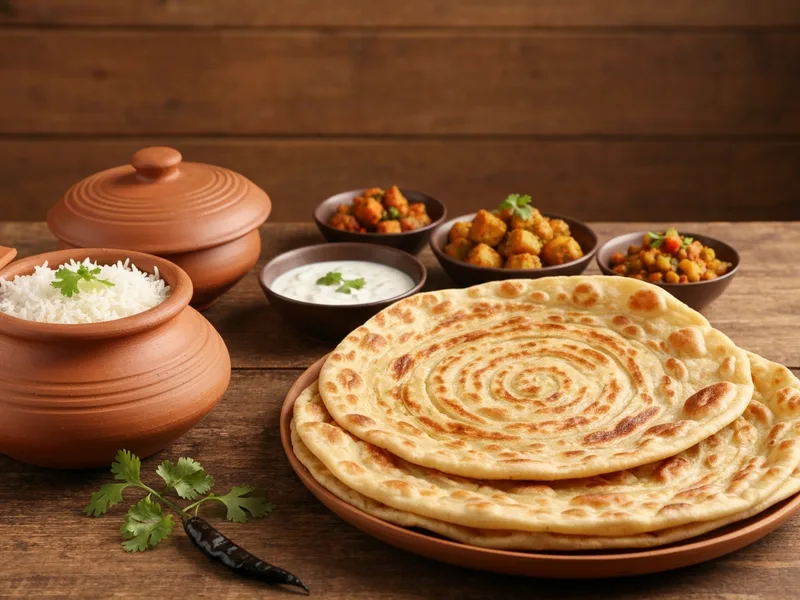
Punjab cuisine
Tandoori Roti
Tandoori Roti is a traditional Punjab Pakistani dish. Tandoori Roti is a thick, slightly smoky whole-wheat flatbread traditionally baked by slapping it onto the scorching inner wall of a clay tandoor oven — where it puffs, blisters, and develops charred spots in a matter of minutes. It is chewier and more substantial than chapati, with an unmistakable smoky char from the intense heat. A home oven method using a cast-iron pan on maximum grill heat gives you a genuinely good approximation.
The tandoor — a cylindrical clay oven fuelled by wood or charcoal that reaches temperatures of 400–480°C — is one of the defining cooking tools of South Asian and Central Asian culinary tradition.
The tandoori roti baked against these clay walls is the most direct culinary connection to that ancient civilisation. Tandoori roti, baked against its blazing inner walls, develops a texture no stovetop or standard oven can perfectly replicate: a slightly chewy, smoky, blistered flatbread that stands up to the richest curries. In Pakistan, tandoors operate in every neighbourhood — the local tandoorchi (bread maker) bakes rotis and naans for the community from early morning. This recipe gives you the traditional method for those who own a tandoor, and a practical home oven method that gets you surprisingly close.
Ingredients
Instructions
- MAKE THE DOUGH: Put the atta and salt in a paraat (wide mixing bowl). Add warm water gradually — start with ½ cup and mix with your fingers. Add more water slowly, a tablespoon at a time, until the dough just comes together. Knead for 6–8 minutes until smooth. HINT: Tandoori roti dough is noticeably stiffer and less sticky than chapati dough. WHY: This is deliberate — stiffer dough adheres to the vertical wall of the tandoor without sliding down. It also gives tandoori roti its characteristic chewy density rather than the lighter fluffiness of chapati. The dough should feel like firm play-dough — it should hold its shape when you press it rather than sagging. Cover with a damp cloth and rest for 30 minutes.
- DIVIDE AND SHAPE: Divide the rested dough into 6 equal balls — slightly smaller than chapati balls since tandoori roti is rolled thicker. Smooth each ball between your palms until it has no cracks on the surface. FUN FACT: In a traditional tandoor setup, the baker would roll the roti on a cushion-like pad called a gaddi and slap it onto the inside wall in one practiced motion. It takes years to develop the speed and confidence to do this without dropping the roti into the fire below — which is why your neighbourhood tandoorchi earns every rupee.
- ROLL THE ROTI: Dust a dough ball lightly in flour and place on your chakla (rolling board). Roll with the belan (rolling pin) to a circle about 16–18 cm across. Tandoori roti is noticeably thicker than chapati — aim for about 3–4 mm thick, roughly the thickness of a thick cardboard. It should not be see-through when held up to light. Rotate the dough a quarter turn after each roll to keep it round. HINT: This thickness is intentional — a too-thin roti will dry out quickly in the tandoor's intense heat rather than puffing and cooking through.
- TRADITIONAL TANDOOR METHOD: If you have access to a tandoor: get it very hot (minimum 20–30 minutes of heating). Dip one side of the rolled roti lightly in water using your hand or a pastry brush — the wet side is the side that will stick to the wall. Press the roti firmly onto the inside wall of the tandoor with the wet side against the clay. It should stick immediately. After 2–3 minutes: charred spots will appear on the surface, and the roti will puff slightly. Reach in with chimta (long tongs) and remove it from the wall. The bottom should be blistered and charred in places. HINT: If the roti falls into the fire, use your chimta — this is a rite of passage, not a failure.
- HOME OVEN METHOD (very effective): Place a cast-iron tawa (griddle pan) or heavy-based oven-safe pan on the top rack of your oven. Turn the oven to its maximum temperature (250°C / 480°F) and switch on the grill/broiler function. Allow the oven and pan to heat for at least 15 minutes — the pan must be scorching hot. WHY: A cold pan placed in a hot oven will not give you the immediate surface sear that creates tandoori roti's charred spots. The pan pre-heating is what makes this method work.
- BAKE THE ROTI: Carefully remove the hot cast-iron pan from the oven using thick oven mitts — it is extremely hot. Lay the rolled roti onto the pan surface. It will sizzle dramatically on contact. Slide the pan back onto the top rack under the broiler/grill. Bake for 3–4 minutes, watching through the oven window. The roti should puff, develop charred spots on the visible surface, and look dry on the edges. HINT: Every oven is slightly different — check at 3 minutes. The roti should look blistered and charred in places, not pale. If it looks pale after 3 minutes, leave it for another minute. Flip using tongs if you want charring on both sides (optional — the bottom against the hot pan will be blistered from direct contact).
- BRUSH WITH GHEE AND SERVE: Remove the roti from the oven. Using a pastry brush or simply by smearing with the back of a spoon, brush a generous layer of ghee or butter over the hot surface. The ghee should melt immediately and soak slightly into the bread. FUN FACT: This ghee brushing is what makes tandoori roti irresistible — the smoky char flavour of the bread combines with the rich, milky fat of the ghee to create something genuinely extraordinary. Serve immediately — tandoori roti is at its best the moment it comes off the heat.
Essential for This Recipe
As an Amazon Associate, we earn from qualifying purchases
Pure Ghee (Clarified Butter)
The authentic cooking fat for Pakistani dishes — adds rich flavor that oil can't match
Chef's Secrets
- The home oven pan must be pre-heated for at least 15 minutes at maximum temperature — this is the most important step for getting charred spots.
- Tandoori roti dough is intentionally stiffer than chapati — do not add extra water thinking you have made a mistake.
- Roll thicker than chapati — 3–4 mm is correct. Too thin and it dries out rather than puffing.
- If using a gas hob at home without an oven, cook the roti on a very hot dry tawa first (2 minutes per side), then hold it directly over the flame with chimta for 30 seconds per side — charring will occur.
- Brushing with ghee immediately after cooking is mandatory for flavour — the ghee absorbs into the hot bread in seconds.
Common Questions
How long does Tandoori Roti take to make?
Total time is 1h 5m — 40m prep and 25m cooking.
How many servings does this recipe make?
This recipe makes 6 servings, and is rated medium difficulty.
Which region of Pakistan is Tandoori Roti from?
Tandoori Roti is from Punjab, Pakistan — one of the country's most distinctive culinary traditions.
What do you serve with Tandoori Roti?
Tandoori roti is designed to accompany robust, rich dishes: nihari (slow-cooked bone broth stew), karahi (wok-cooked meat curry), paye (trotters), or dal makhani. Its sturdy, chewy texture holds up to thick gravies without disintegrating the way a thin chapati can. Brush generously with ghee and serve hot.
Goes Well With
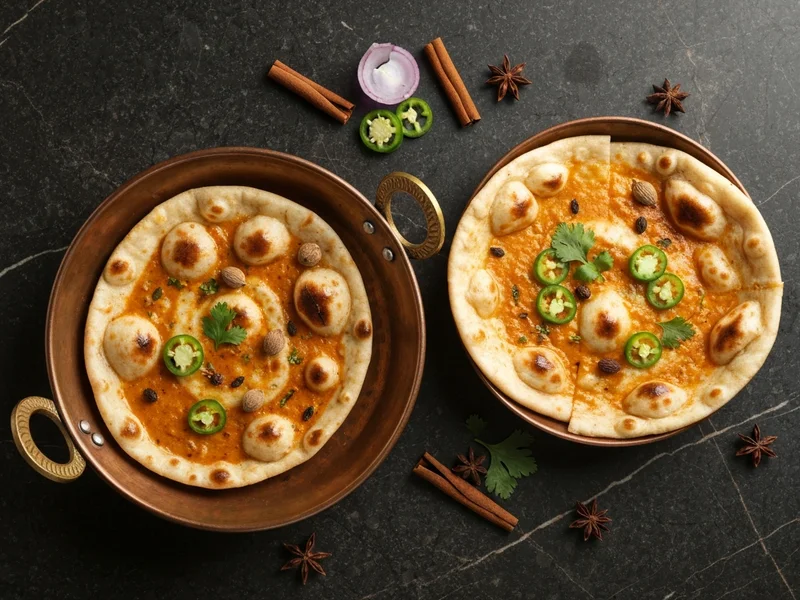
Butter Naan (Home Tawa Method)
Soft, pillowy butter naan made at home on a tawa (flat griddle) — no tandoor required. Brushed with makhan (butter) the moment it comes off the heat, this leavened flatbread is the perfect vehicle for any Pakistani curry.
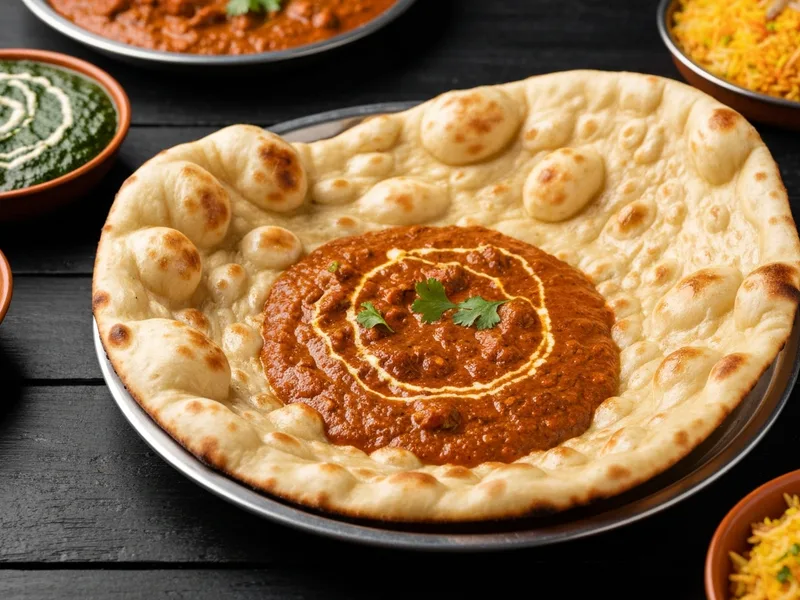
Roghni Naan
Roghni Naan is the Rolls-Royce of Pakistani bread — leavened, egg-enriched, oil-glossed, and studded with sesame and nigella seeds, baked until golden and billowy. It is the bread that makes any meal feel like a celebration, and once you've baked your own, the bakery version will never quite measure up.
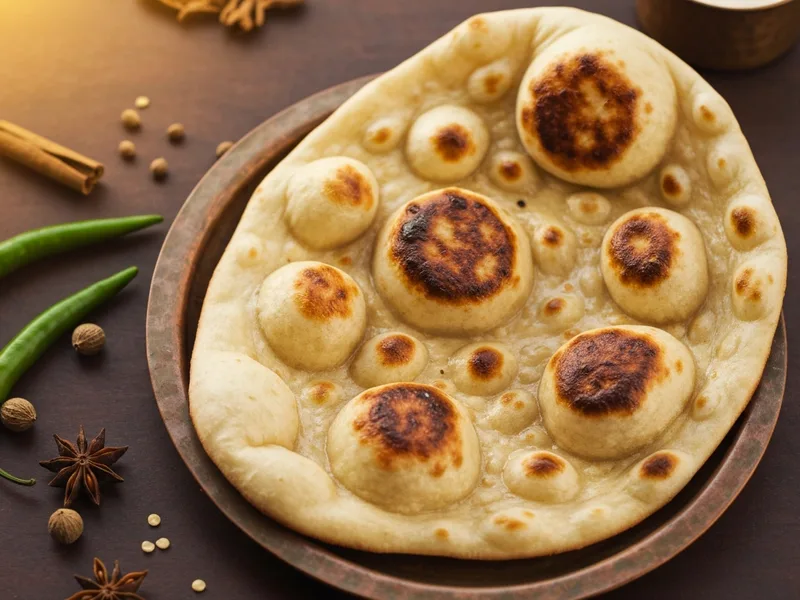
Garlic Naan
Garlic Naan takes everything great about a classic leavened naan and then — at the very last second — hits it with raw garlic butter and fresh coriander that cook against the bread's scorching heat. It is aggressively good, impossible to stop eating, and ready in under 10 minutes of baking.
Cite This Recipe
Writing about Pakistani food? Use these ready-made citations.
<a href="https://pakistani.recipes/recipes/garlic-naan/garlic-naan/">Garlic Naan</a> — Pakistani Recipes
Ahmed Khan. "Garlic Naan." Pakistani Recipes, 2024. https://pakistani.recipes/recipes/garlic-naan/garlic-naan/
Ahmed Khan. (2024). Garlic Naan. Pakistani Recipes. Retrieved 2026-07-20, from https://pakistani.recipes/recipes/garlic-naan/garlic-naan/
What Cooks Are Saying
The instructions are so clear and easy to follow. Came out perfectly first try.