Punjab cuisine
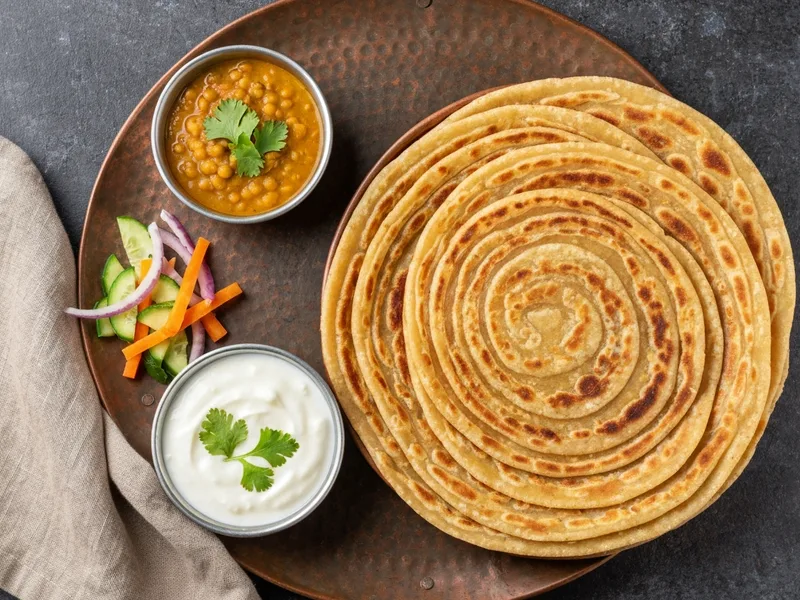
Lachha Paratha
Lachha Paratha is a traditional Punjab Pakistani dish. Lachha Paratha is the showstopper of Pakistani flatbreads — a multi-layered, flaky paratha made by the coil method that creates dozens of crisp, butter-kissed layers visible when you hold it up to the light. When you pull it apart, it falls into beautiful golden ribbons. It is the kind of bread that makes people ask who made this and then look at you differently.
Lachha means 'layers' in Urdu and Punjabi, and every fold of this paratha is intentional — each one adding another stratum of crisp, buttery, slightly shattering bread.
The same lamination technique appears in the Yemeni flatbread 'malooga' and the Sri Lankan 'roti canai,' suggesting a shared culinary ancestry. Lachha Paratha is a fixture on the breakfast table across Punjab, particularly in Lahore and Faisalabad, where it is paired with halwa or achar (pickle) and eaten at a pace that suggests no one has anywhere important to be. The coil technique — rolling thin, coating with ghee, folding accordion-style, coiling into a snail shape, then flattening — seems complicated when described but is entirely learnable with one or two practice rounds. By the third paratha, your hands will know what to do without your brain's involvement.
Ingredients
Instructions
- MAKE THE DOUGH: In a large paraat, combine your flour of choice and salt. Add the oil and rub it in with your fingers until the flour looks like wet sand — this is called 'short-shortening' the flour and gives a slightly tender result. Now add the lukewarm water gradually, mixing as you go. Knead the dough for 7–8 minutes until it is smooth, soft, and does not stick to your hands. It should feel like a firm, smooth pillow — not as soft as naan dough, slightly firmer. HINT: Lachha Paratha dough needs to be a bit firmer than roti dough so it can be rolled extremely thin without tearing. WHY: Firm, well-kneaded dough has strong gluten — this prevents it from tearing when you stretch it thin during the layering process.
- REST THE DOUGH: Shape the dough into a ball, cover with a damp cloth or bowl, and rest for 20–30 minutes at room temperature. WHY: Resting allows the gluten to relax completely. You will be rolling this dough very thin — if the gluten is tense, the dough will spring back every time you try to roll it out, like it has opinions. Resting removes those opinions. FUN FACT: Professional paratha makers in Lahore can roll a dough ball paper-thin in under 30 seconds. Practice makes the difference between a thick, uneven paratha and a proper lachha — do not be discouraged on your first try.
- DIVIDE THE DOUGH: After resting, divide the dough into 5–6 equal balls. Keep all but one covered under the damp cloth while you work on each one — exposed dough dries out and forms a skin that makes rolling difficult and creates uneven texture.
- ROLL THIN: On a lightly floured chakla, roll one dough ball into as thin a circle as possible — ideally 2–3mm thick, roughly the size of a medium-large plate (28–30cm). The thinner you roll it, the more layers you will get in your final paratha. If it tears, patch it and keep rolling. A little imperfection is fine — your paratha will still be delicious. HINT: Roll from the centre outward, rotating the dough quarter-turns as you go. This keeps the circle even.
- SPREAD THE GHEE: Using the back of a spoon or your fingers, spread roughly 1 teaspoon of soft or melted ghee (or butter) all over the surface of the rolled dough, right to the edges. The ghee should be soft — not liquid. If it is too liquid, it will absorb immediately and you will lose your layers. If you are using melted ghee, let it cool slightly first. WHY: The ghee creates a barrier between each layer — when the paratha hits the hot tawa, the fat creates steam that forces the layers apart, making each one crisp and separate.
- FOLD ACCORDION-STYLE: Now fold the ghee-covered dough into pleats, like a fan or an accordion. Start from one edge and fold over roughly 2–3cm, then fold back the other direction 2–3cm, and keep going all the way across the dough. You should end up with a long, thin, pleated strip — like a fabric fan. HINT: Do not press down on the folds — keep them loose. You want layers of dough with air and ghee between them, not a compressed strip.
- COIL INTO A ROUND: Take the accordion-folded strip and coil it into a tight snail shell shape — starting from one end and winding the strip around itself. Tuck the end underneath. You now have a round, coiled disc of dough with dozens of layers spiralling outward. This is the moment where your lachha paratha is already decided — the coil is the architecture. HINT: Make the coil tight in the centre and slightly looser at the outside edges. This helps the final rolling stay even.
- FLATTEN AND ROLL: Press the coiled disc flat with your palm — firmly but gently. Then use the belan to roll it out again into a round paratha about 18–20cm across and 5–6mm thick. Go slowly and evenly — do not bear down too hard or you will compress all those layers you just created. You should be able to see the spiral of layers at the edges of the paratha as you roll. WHY: This final rolling bonds the coil into a flat paratha while preserving the internal layer structure. Too thin and the layers flatten out; too thick and the paratha won't cook through properly.
- COOK ON THE TAWA: Heat a tawa (flat griddle pan) or heavy frying pan over medium-high heat until a few drops of water flicked onto it evaporate in under 2 seconds — that is your cue that it is ready. Place the rolled paratha on the tawa. Cook for about 2 minutes on the first side — you will see the top surface begin to look slightly dry and small bubbles forming. Flip using a chimta (tongs) or a wide spatula. The cooked side should have golden patches. HINT: Do not press the paratha down with a spatula — you will squish your layers. Just let it sit and cook.
- ADD GHEE AND FINISH: After flipping, add about half a teaspoon of ghee to the tawa around the edges of the paratha and let it sizzle underneath. Cook 1–2 more minutes. Flip once more, add another tiny amount of ghee to the other side. The paratha should now have golden-brown patches on both sides and smell of toasted, buttery dough. The total cook time per paratha is around 4–5 minutes on medium-high heat. FUN FACT: The sound you are looking for when the paratha is almost done is a dry, slightly crisp sizzle rather than the wet, heavy sizzle of beginning cooking — the sound of water evaporating from the dough changes as the paratha cooks through.
- THE CLAP TEST AND SERVE: When the paratha is done, hold it with both hands (use the chimta or a cloth so you don't burn yourself) and give it a gentle scrunch — squeeze and release. The layers should separate visibly and the paratha should fluff up slightly and hold air between the layers. This is the lachha moment — when you see the layers separate, you have done it correctly. Serve immediately, with ghee on top if you are feeling generous (you should be).
Essential for This Recipe
As an Amazon Associate, we earn from qualifying purchases
Pure Ghee (Clarified Butter)
The authentic cooking fat for Pakistani dishes — adds rich flavor that oil can't match
Chef's Secrets
- For the flakiest layers, use maida (all-purpose flour) rather than atta — the lower protein content gives a more tender, shattering layer.
- Using very soft (not melted) ghee for spreading gives better layer definition than liquid ghee.
- You can make the coiled dough balls in advance and refrigerate them for up to 24 hours — bring to room temperature before rolling and cooking.
- For a savoury version, sprinkle a tiny pinch of ajwain (carom seeds) on the ghee before accordion-folding — it adds a faint spiced aroma to each layer.
- The secret to not sticking: keep your chakla lightly dusted with flour and flip the dough occasionally while rolling so it never has a chance to stick.
Common Questions
How long does Lachha Paratha take to make?
Total time is 1h 5m — 40m prep and 25m cooking.
How many servings does this recipe make?
This recipe makes 5 servings, and is rated medium difficulty.
Which region of Pakistan is Lachha Paratha from?
Lachha Paratha is from Punjab, Pakistan — one of the country's most distinctive culinary traditions.
What do you serve with Lachha Paratha?
Serve hot with halwa (semolina pudding) for breakfast, or with any curry for lunch or dinner. Lachha Paratha is a universal pairing partner — it works with aloo gosht, dal makhani, or simply with plain dahi and a pinch of salt. Eat it while it is hot and the layers are still distinct.
Goes Well With
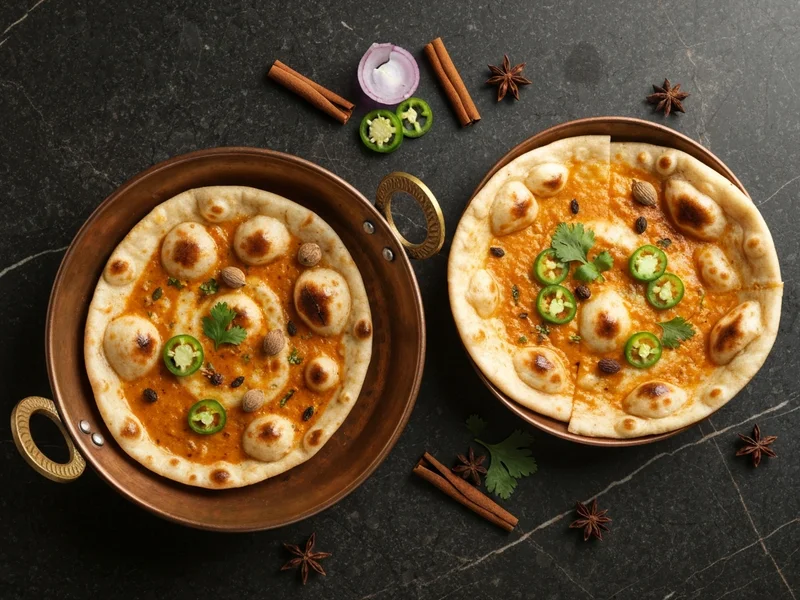
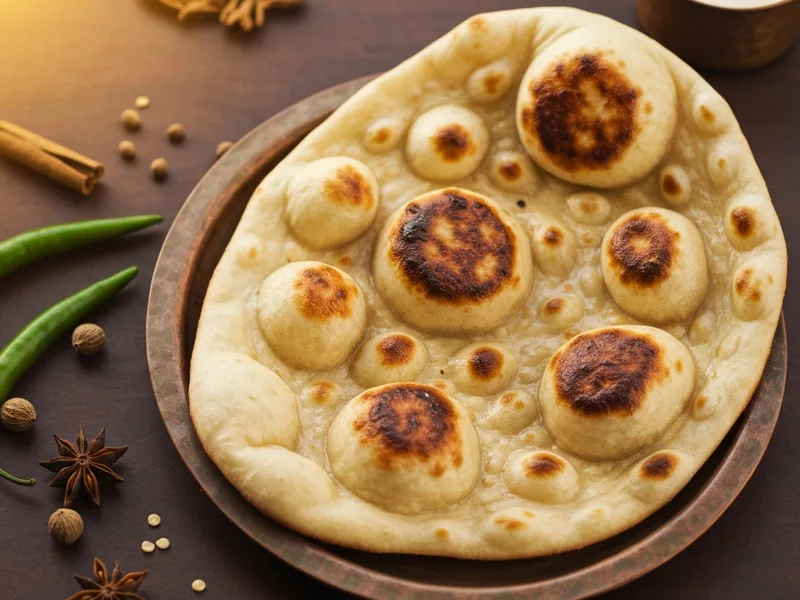
Butter Naan (Home Tawa Method)
Soft, pillowy butter naan made at home on a tawa (flat griddle) — no tandoor required. Brushed with makhan (butter) the moment it comes off the heat, this leavened flatbread is the perfect vehicle for any Pakistani curry.
Roghni Naan
Roghni Naan is the Rolls-Royce of Pakistani bread — leavened, egg-enriched, oil-glossed, and studded with sesame and nigella seeds, baked until golden and billowy. It is the bread that makes any meal feel like a celebration, and once you've baked your own, the bakery version will never quite measure up.
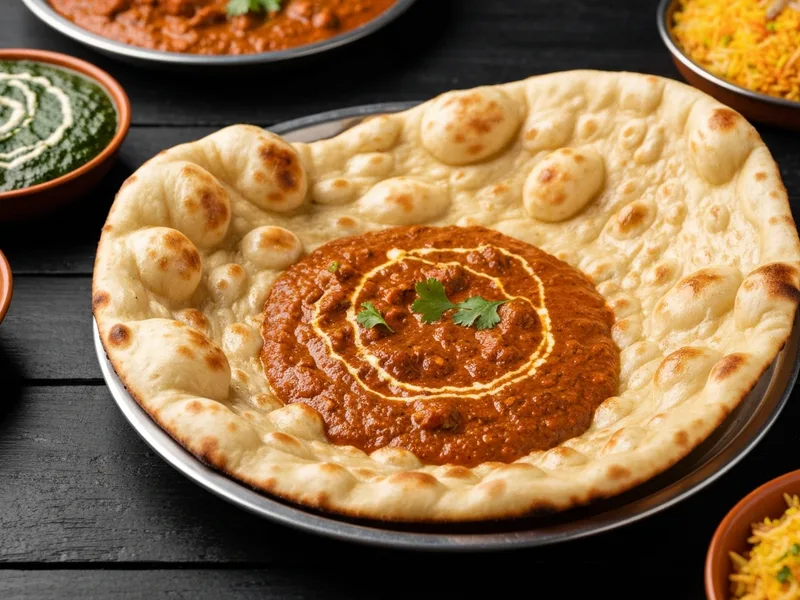
Garlic Naan
Garlic Naan takes everything great about a classic leavened naan and then — at the very last second — hits it with raw garlic butter and fresh coriander that cook against the bread's scorching heat. It is aggressively good, impossible to stop eating, and ready in under 10 minutes of baking.
Cite This Recipe
Writing about Pakistani food? Use these ready-made citations.
<a href="https://pakistani.recipes/recipes/garlic-naan/garlic-naan/">Garlic Naan</a> — Pakistani Recipes
Ahmed Khan. "Garlic Naan." Pakistani Recipes, 2024. https://pakistani.recipes/recipes/garlic-naan/garlic-naan/
Ahmed Khan. (2024). Garlic Naan. Pakistani Recipes. Retrieved 2026-06-15, from https://pakistani.recipes/recipes/garlic-naan/garlic-naan/
What Cooks Are Saying
The instructions are so clear and easy to follow. Came out perfectly first try.